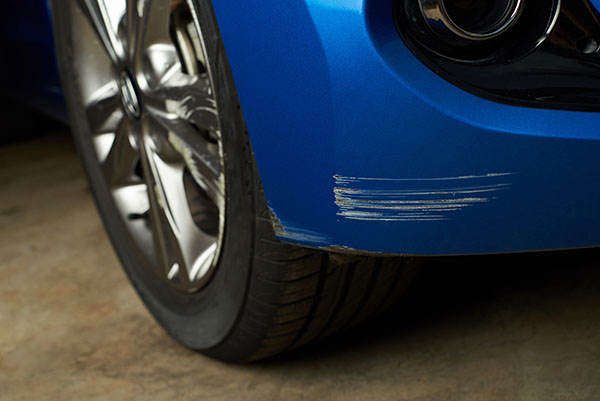
We've all been there - the dreaded sight of a scratch on our car's pristine surface. Whether it's the result of a stray shopping cart, a careless driver, or a small accident, scratches can be unsightly and frustrating. While professional repairs are an option, you can also have a little bit of fun if you are into DIY projects. Here is a short guide to scratch removal at home:
1. Gather the Right Materials
Before diving into the repair process, make sure you have the necessary materials on
hand. You'll need:
- Microfiber towels or soft cloths
- Car wash soap
- Rubbing alcohol
- Scratch remover compound or polishing compound
- Wax or sealant
2. Clean the Area Thoroughly
Start by washing your car with special wash soap and water to remove any dirt and grime from the scratched area. Make sure the surface is completely dry before proceeding.
3. Assess the Scratch
Determine the depth of the scratch. If the scratch is deep enough that it catches your fingernail, it may require professional attention. For surface-level scratches, DIY repair methods are often effective.
4. Utilize the Scratch Remover or Polishing Compound
For surface-level scratches, a scratch remover or polishing compound can work wonders. Apply a small amount of the product to a soft cloth and gently rub it into the scratched area in a circular motion. Be patient and avoid applying excessive pressure, as this can worsen the scratch or damage the paint further.
5. Clean with Rubbing Alcohol
After using the scratch remover or polishing compound, clean the area with rubbing alcohol to remove any residue. This step ensures that the repaired section is ready for the next stage of the process.
6. Apply Wax or Sealant
Finish off the DIY repair by applying a layer of wax or sealant to protect the newly repaired area. The wax or sealant will also help blend the repaired section with the surrounding paint, resulting in a more seamless finish.
7. Buff and Blend
For a more professional finish, gently buff the repaired area with a microfiber towel to further blend it with the surrounding paint. This step helps to achieve a smooth and even appearance.
Pro Tips and Precautions from Us:
- Always test any products or methods on a small inconspicuous area before applying them to the entire scratch.
- For deep scratches or those that extend beyond the clear coat, professional repair may be necessary to prevent further damage.
- Regularly wax and maintain your car's paint to protect it from scratches and other external elements.
If you have had a more unfortunate accident and your bumpers or exterior lights need to be changed, contact us at Springdale Automotive!